This past weekend I decided that I would try to employ some of the lighting techniques using different light sources in order to generate decent headshots of a willing model. I have read about and studied the techniques used by such stalwart pros as Joe McNally, David Hobby and David Black...but I never have seriously tried to translate the books into real life. I also decided to take advantage of some wonderful natural light in a favorite studio setting of mine to create a nice image of my friend Robyn.

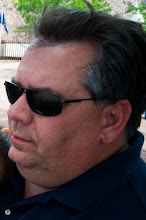
The thing you need to understand about most of the models that I will be working with in the near term is this: They are all strong women with a certain presence and gravitas that is not wasted on the young. They are mature...with beautiful countenances that speak of character built through real experience. As it is with such goddesses (my own partner in life, Ms. C, also falls into this category), there are nuances that they choose to address with a little makeup...and a few touches here and there that can take the makeup to a whole 'nuther level - while keeping it real. The image you see at the left here is pretty much straight out of the camera. I have used Adobe Camera Raw to convert the raw image from my Nikon D3 into the starting point you see here. You can see that there are a few issues (no doubt created by poor posing set up by the photographer) that, if addressed properly, will turn this good photograph into a really nice image suitable for framing.

I opened the image using Photoshop CS3 and did a little cleanup, levels and curves adjustments in order to get to a "clean" starting point for my final editing steps. The next procedure that I employed is one that I picked up from a professional who goes by the screen name "Evil4blue" on Texasphotoforum.com . It is intended as a portraiture skin finishing technique that will give your model as much of a skin glow as you want her to have. The procedure is as follows:
1) Open image
2) Create 2 new layers (name them Hi and Low or whatever you want)
3) Now click the original layer and do a luminosity selection (alt + ctrl + '~').
4) Copy this selection into the Hi layer
5) Repeat 3, then inverse selection
6) Copy this into the Low layer
7) Now, do a Gaussian blur on the Hi with a radius of about 20 (really depends on the photo)
8) Repeat 7 on the Low layer with half the radius
9) Merge the 2 layers, then go to the filters and add a little Gaussian grain to the blurred/merged layer
10) Copy the background over the newly created layer and use some masking to let the adjusting layer show through
The image above at the right is the "after" shot with all of the editing in place. There are many products out there that offer portraiture help to the photographer. However, this method required no new software, no new learning curves, and most importantly - didn't cost a dime. And who doesn't need help like this during times like ours?
I still wasn't satisfied though. The high contrast image just screamed out for another treatment. I used the black and white converter built in to CS3 to take advantage of what I had - and the resulting image seen below...well, my client and a few others seem to be really happy with it. I see things I could still improve on...but that was the point! This was a learning exercise - And one that I thought might be worth sharing.
This beautiful lady rocks!!! And I thank the gods that she has been my friend for over 15 years.
Keep the faith.


No comments:
Post a Comment